
Waldorf Star Lanterns


☁

Prepare the day before:
Make a 'wet on wet' watercolor painting on good quality paper.
Let dry and rub the back lightly with a cloth dipped in vegatable oil.
Leave overnight.

Cut big circles out of you paper,
I used a the biggest plate I could find in the house.

Fold in eight equal pieces.

Trim off the round bits with a ruler, scalpel/scissors.

Fold it in 16 equal pieces.

Fold a square,
unfold,
turn paper a 1/4,
fold square again.

Your paper looks like this.
Get the corners and fold backwards.
Unfold and turn 1/4,
fold a square again,
fold the other corners backwards,
unfold.

Your paper looks like this, with little diamond folds everywhere!
Those little diamonds are going to stay,
the big triangles need to be folded backwards.
(I know you are puzzled now,
but have a close look at your paper,
you will work it out!)

You See?
Big triangle is going backwards,
the little diamond is staying in front.

After a few triangles,
start to shape the bottom a bit.

Tada!
Hurry, make more before you'll forget!

☁

I know a lot of mother already posted this fun activity.
But I simply couldn't resist...
So much fun and so incredibly easy.

You will need:
1 cup of plain white flour
½ cup of salt
2 teaspoons of tartaric acid baking powder (would that be cream of tartar?)
1 cup of water
1 tablespoon of oil + few drops of essential oil
food coloring (beet root water/ turmeric etc. or bought ones)

Put in saucepan, stir to get the lumps out.

Keep stirring!

Acracadabra!
It's like magic.
There is your dough.

Let it cool and knead for a couple of minutes before storing in an airtight container in your fridge.

Today our Yellow smells like Honey/camomile.
Our Orange like Lavender
and our Red like fire (the most fantastic smell from Boutriba for your fire child!)

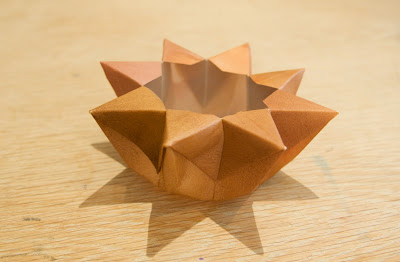
☁


✸ garland

We love this shape or origami stars,
they remind us of the beautiful home birth of Roemer.
Just after midnight,
Roemer arrived in total peace.
Full moon and candle light,
healthy and blessed.
Pure magic.
After his first mother's milk,
it was time for him to meet our midwife.
she took a measuring tape out of her bag
and gently measured his lovely little body.
When she was done
she folded a tiny little star,
for us to keep.
How cool is that?

These origami stars are so easy to make,
you can do this any time of the day.
You will need:
beautiful paper (I used Japanese paper in midnight blue with bleached dots)
scissors or scalpel/cutting board
beautiful thread (I used thin gold thread)
a thin needle
1. cut strips of paper,
various widths will be various sizes stars

2. make a knot


3. make it tight, but don't go over the folding line with your fingers.
this will need to stay a bit puffy.

4. Fold the beginning of the paper back.
You will see which way it should tucked in.


5. Start to wrap the strip around and around and around.
The strip will lead you to the right side.

6. Tuck the end in the star.

7. With the end of your thumb,
gently push to puff up a side.

8. continue to do so.

9. Make lots!

10. Put on a beautiful thread with a thin needle.
Have fun!
✸
I'll share my 'Big Cheat dress' with you all.
For the ones who actually can't sew.
(like me!!!)
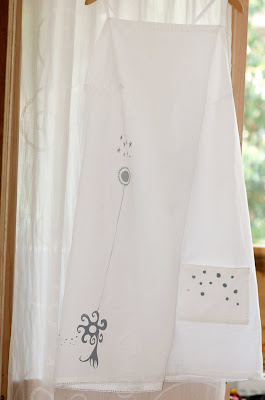
This is the front

This is the back

First of all,
Go and find yourself two similar cot sheets.
Mine, for instance, have these nice frills to them.
You can have embroidered ones,
colored ones, whatever you like.

Prewash and Iron them.
I screen printed mine of course, no surprise there.
I sewed the sides together,
stop for room for armpits.
I made a little A-line.
Then I made the upper part.
If you look carefully at the first picture,
you see exactly what I did.
I decided how wide the upper front had to be by holding one sheet in front of me.
I ironed some folds and sewed
(I don't do needles/ patterns or any other professional things)
The backside I did almost nothing,
I just pulled a cord through the already exciting end.
And made, just like the front,
a little a line.
You do see what I mean?
(I probably won't be asked to become a teacher in this life, sorry !)

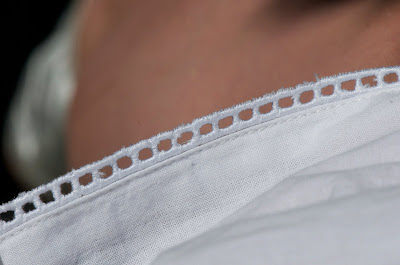
If you put your dress on, you will see that it doesn't make any sense in front.
That's when I understood why these little breast lines come in.
So I made those too.
You can see one under my hand (click to enlarge).
I think it's 6 cm long.
(The top photo shows them as well)

Make a little pocket or not.
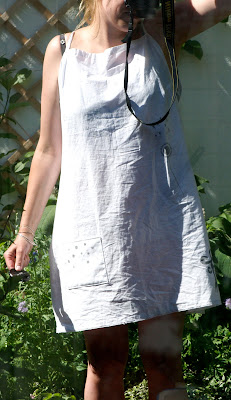
and after a whole day wearing,
you will look like this if you look in the glass shed door:

Great for nighttime too,
if you are not brave enough to walk around in a shapeless cheat sheet dress!

The best part about this dress is it will take no effort at all to make,
because you don't have to worry at all about the inside.
You will recycle the beautiful stitches made in,
hopefully not the worst,
sweatshops around the world.
One of my neighbors made a compliment about my dress.
I didn't even tell her I made it myself.
So go on,
find yourself the most beautiful bed linen in your closet,
before your toddler pukes on it!